
Setting up your aquarium stand might feel like a big task, but it doesn’t have to be. You want a sturdy, reliable base to showcase your beautiful aquatic world, and getting it right from the start is key.
This guide will walk you through each step, making the assembly simple and stress-free. By the end, you’ll have the confidence and know-how to build a stand that perfectly supports your tank and enhances your space. Ready to get started?
Let’s dive in and make your aquarium setup a success!
Choosing The Right Stand
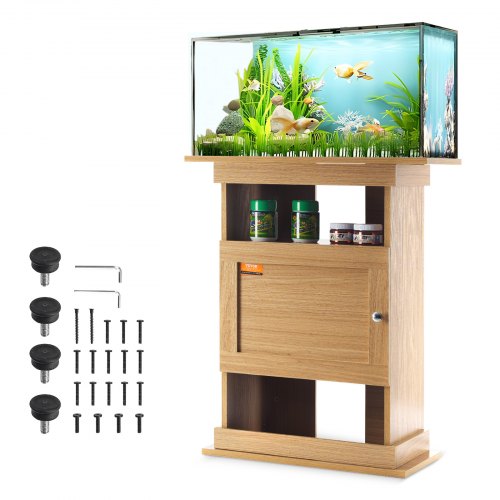
Picking the right stand for your aquarium is very important. The stand supports the tank and keeps it safe and stable.
Consider the material, weight capacity, and size before making a choice. These factors affect the durability and fit of the stand.
Material Options
Aquarium stands come in different materials. Each has its benefits and drawbacks. Choose a material that suits your style and tank needs.
- Wood: Strong and classic look but can get damaged by water.
- Metal: Durable and modern but may rust if not treated.
- Plastic: Lightweight and water-resistant but less sturdy.
- MDF or Particleboard: Affordable but can swell if wet.
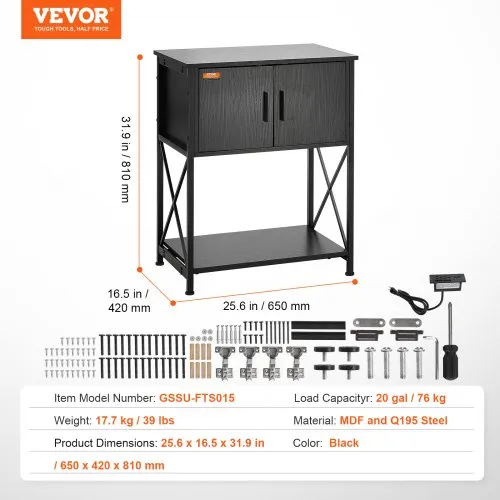
Weight Capacity
Check the stand’s weight limit before buying. The stand must hold the tank’s full weight with water, decorations, and fish.
| Tank Size | Approximate Weight (lbs) | Recommended Stand Capacity (lbs) |
| 20 gallons | 210 | 250 |
| 40 gallons | 420 | 500 |
| 75 gallons | 780 | 850 |
| 100 gallons | 1040 | 1100 |
Size And Dimensions
The stand must fit the aquarium’s base perfectly. A stand too small or too big can cause instability or look odd.
Here are tips to check size:
- Measure the tank’s length and width.
- Pick a stand with equal or slightly larger dimensions.
- Ensure the stand height suits your viewing comfort.
Credit: www.vevor.ca
Tools And Materials Needed
Assembling an aquarium stand requires some basic tools and materials. Getting everything ready helps the process go smoothly. You will need tools for measuring, cutting, and fastening parts together.
This guide lists the essential tools and additional supplies you may need. Having these items on hand saves time and effort during assembly.
Essential Tools
These tools are necessary to build a sturdy and safe aquarium stand. Make sure each tool is in good working order before you start.
- Measuring tape – for accurate dimensions
- Power drill with drill bits – to make holes and drive screws
- Screwdriver set – for tightening screws
- Level – to ensure the stand is even
- Hammer – for fitting parts or nails
- Wood saw or circular saw – to cut wood pieces
- Clamps – to hold parts steady while assembling
- Safety goggles and gloves – for protection
Additional Supplies
Besides tools, you need some materials to complete the aquarium stand. These supplies depend on the design and size of your stand.
| Material | Purpose |
| Wood boards | Main structure of the stand |
| Wood screws | Secure parts together |
| Wood glue | Extra bonding strength |
| Sandpaper | Smooth rough edges |
| Paint or wood finish | Protect and decorate the stand |
| Rubber feet or pads | Prevent slipping and protect floors |
Preparing The Workspace
Setting up an aquarium stand needs a clean and safe workspace. This helps you work faster and avoid mistakes.
Before starting, prepare your area carefully. This makes assembly easier and safer for your aquarium.
Clearing The Area
Remove all items near where you will build the stand. This gives you space to move and work freely.
Clear floors and surfaces to avoid tripping or damaging parts. Keep tools handy but organized.
- Move furniture away from the assembly spot
- Pick up rugs or carpets that may cause slips
- Keep children and pets out of the area
- Have a clean table or flat surface for small parts
Ensuring Level Surface
Check that the floor or surface is level where the stand will sit. A flat surface supports the aquarium safely.
Use a spirit level tool to test the area. Adjust with shims if the surface is uneven to prevent wobbling.
- Place the level tool on the floor or stand base area
- Look for bubbles centered between the lines
- Use wooden or plastic shims to fix any tilt
- Double-check after adding shims to ensure stability
Step-by-step Assembly
Building your aquarium stand needs care and patience. This guide will help you put it together safely. Follow each step to make sure it is strong and steady.
Take your time and check each part as you go. Clear space and good light make the task easier.
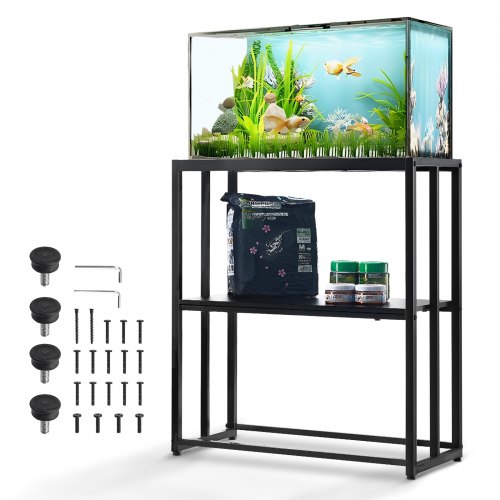
Unpacking And Organizing Parts
Start by opening the box carefully. Lay all parts on a flat surface. Check the list to make sure nothing is missing.
- Wooden panels
- Screws and bolts
- Brackets and supports
- Tools like Allen key or screwdriver
- Assembly instructions sheet
Assembling The Frame
Put together the main frame first. Align the panels and join them with screws. Use clamps if you have them to hold parts steady.
| Part | Position | Notes |
| Bottom panel | Base | Flat side down |
| Side panels | Left and right | Check for holes |
| Back panel | Rear | Use screws for support |
| Top panel | Cover | Leave open if needed |
Securing Joints And Supports
After the frame is set, fix all joints tightly. Add brackets where needed to strengthen corners. Check that the stand does not wobble.
- Use a screwdriver to tighten all screws firmly
- Place metal brackets inside corners for extra hold
- Test the stand by pressing gently on different sides
- Adjust any loose parts before placing the aquarium
Positioning The Stand
Placing your aquarium stand correctly is very important. A good position helps keep the tank safe and stable.
This guide covers how to find the best location and check the stand’s stability.
Finding The Best Location
Pick a spot that is strong and flat. Avoid places near windows or doors where sunlight or drafts can affect the tank.
Make sure the location is easy to reach for feeding and cleaning. Also, check that the floor can hold the full weight of the aquarium and stand.
- Choose a flat, level surface
- Avoid direct sunlight and drafts
- Keep near a power outlet
- Allow space for maintenance
- Check floor weight limits
Checking Stability
Test the stand by placing it on the chosen spot. It should not wobble or tilt. Use a level tool to check if it is even.
If the stand moves, add shims or pads under the legs to stabilize it. Stability helps prevent accidents and keeps the aquarium safe.
- Place stand on the floor
- Check for wobbling
- Use a level to ensure evenness
- Add shims if needed
- Ensure all legs touch the floor
Placing The Aquarium
Setting up an aquarium stand requires care. It’s important to place it correctly to keep your fish safe.
Choose a sturdy spot. Ensure the floor can handle the aquarium’s weight.
Lifting And Setting
Gather a few friends to help lift the aquarium. This prevents accidents and injuries.
Lift carefully to avoid sudden movements. Set the aquarium gently onto the stand.
- Ensure the stand is level before placing
- Use a level tool to check alignment
- Adjust the stand if necessary
Final Adjustments
After placing, check for stability. The stand should not wobble or tilt.
Make any final adjustments to ensure everything is secure. This will protect your fish and tank.
| Check Stand Level | Use a spirit level tool |
| Verify Stability | Push gently to test |
| Secure Position | Adjust if needed |
Maintenance Tips
Keeping your aquarium stand in good shape is important. Regular maintenance helps it last longer and supports your tank safely.
Here are some useful tips to ensure your aquarium stand remains sturdy and reliable.
Regular Inspections
Check your aquarium stand every few weeks. Look for any signs of wear or damage.
Make sure all screws and bolts are tight. Loose parts can lead to accidents.
- Inspect for rust or corrosion on metal parts
- Check wooden parts for cracks or water damage
- Ensure the stand is level and stable
Handling Weight Changes
Aquarium stands must handle changes in weight. Adding or removing water affects the stand’s balance.
Always distribute the weight evenly. This helps prevent tipping or damage.
- Use a level to check the stand after changes
- Adjust the tank’s position if needed
- Ensure weight is evenly spread across the stand
Credit: www.vevor.ca
Credit: www.vevor.ca
Frequently Asked Questions
How Do I Assemble An Aquarium Stand Step-by-step?
Start by unpacking all parts and tools. Follow the instruction manual carefully. Attach the frame first, then shelves. Secure screws tightly for stability. Ensure the stand is level before placing the tank.
What Tools Are Needed For Aquarium Stand Assembly?
Common tools include a screwdriver, wrench, and hammer. Some stands may require an Allen key or drill. Check the manual for specific tool requirements before starting.
How Long Does It Take To Assemble An Aquarium Stand?
Assembly usually takes between 30 minutes to 2 hours. The time depends on the stand’s complexity and your experience level. Reading instructions thoroughly speeds up the process.
Can I Assemble The Aquarium Stand Alone?
Yes, many stands can be assembled solo, but having a helper is safer. Assistance helps manage heavy parts and ensures accuracy. For large stands, two people are recommended.
Conclusion
Building your aquarium stand can be simple and rewarding. Follow each step carefully for a strong, safe stand. Use the right tools and take your time. Check all parts fit well before tightening screws. A sturdy stand supports your tank and fish.
Enjoy your new aquarium setup with peace of mind. Keep this guide handy for future projects. Your fish will thank you for a safe home.